A question I get asked a lot is whether the Matterport virtual tour can be used as a film, for example, ‘can my virtual tour be added to YouTube?’ The short answer is no, however, there is a potential workaround.
What are the similarities between a film and a Matterport virtual tour?
Both a standard website film and a Matterport virtual tour are very similar in the way they’re normally added to a website – by using the HTML iFrame tag. Both can be added to virtually any website and both are well supported most CMS’s such as WordPress
What are the differences between a film and a Matterport virtual tour?
Films are something you simply watch, as opposed to the Matterport virtual tour which is interactive. The virtual tour requires input from touch or mouse clicks to work, the film just requires you to watch it. Therefore, they have to be treated differently by the browser.
Ultimately though, it’s down to the website you’re adding the virtual tour to though whether is has the sophistication required to include a Matterport virtual tour – and most don’t. Examples of sites that do support virtual tours are Zoopla & Rightmove.
What is an iFrame?
An iFrame is an HTML tag that allows you to include content from a different website in your site. It works a bit like a window – you specify where it should be, how big it should be, and what content it should display. You can actually include virtually any content you can find on the internet in an iFrame, for example, the Google Home Page or a YoutTube video.
As with most HTML tags it needs at least a start tag, an end tag, and the content specified. You can interact with the iFrame content just as you would with the contents if you’d accessed it directly.
Here is an example:
And here is the code I added to this site to display it.
<iframe width="560" height="315" src="https://www.youtube.com/embed/0ieAIqqleIo?controls=0" title="YouTube video player" frameborder="0" allow="accelerometer; autoplay; clipboard-write; encrypted-media; gyroscope; picture-in-picture" allowfullscreen></iframe><iframe> is the start tag. </iframe> is the end tag (which tells the browser that everything between these tags relates to the iframe). width=”560″ height=”315″ specify the size of the ‘window’, and src=”https://www.youtube.com/embed/0ieAIqqleIo?controls=0″ specifies the content to display in the iFrame window. That’s the minimum an iFrame needs. All the extra tags (most of them YouTube specific) add extra levels of control over the embedded film
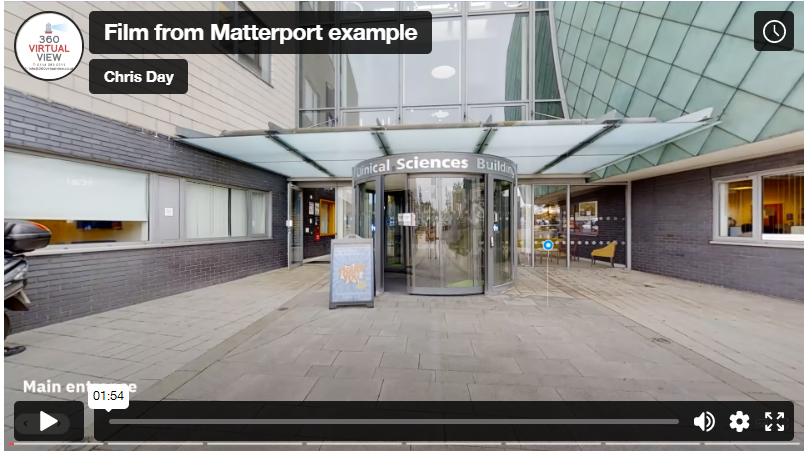
Virtual tour as a film – a workaround
As virtual tours require interaction to work, viewing it as a film requires it to be converted into the passive film format i.e. just press ‘play’ and watch it. Therefore, the workaround I use is to capture the virtual tour usage. Doing it like this means you have full control over things like what is shown, and how long the film is. You can then also add extra contents such as other film snippets, narration, images, music, etc.
This basic version below shows a simple conversion of Matterport virtual tour to a film – in this example there is no editing, just the contents as captured. However, once the contents is captured, it can be edited as a normal film:
0 Comments Leave a comment